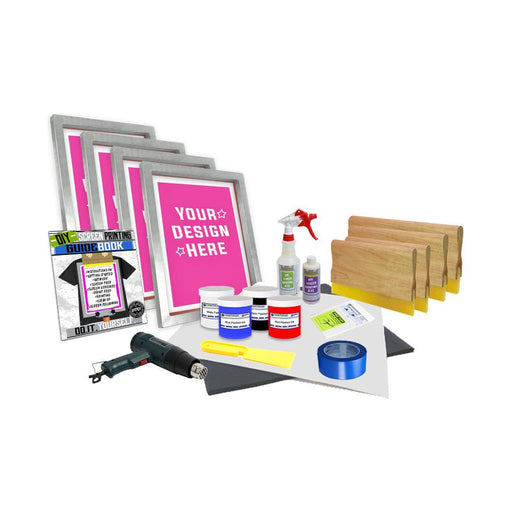
Silk Screening Supplies: A Guide to Getting Started
Silk screening, more commonly known as screen printing, is a versatile way to transfer designs onto materials such as fabric, paper, card and wood. Whether you are setting up a home studio or preparing for a larger print run, having the right supplies makes the process easier and helps produce consistent results.
Essential screen-printing supplies
Screen and frame
The screen is a fine mesh stretched over a frame. Frames are often made from wood or aluminium, while the mesh is usually polyester. Mesh count affects how much ink passes through: a lower count is generally suitable for bolder designs and thicker inks, while a higher count can capture finer detail. Choose a screen size that comfortably accommodates your artwork and the item being printed.
Squeegee
A squeegee pushes ink through the open areas of the screen and onto the surface below. Its blade should be wide enough to cover the design in a smooth, controlled pass. Softer blades can work well with some inks and surfaces, while firmer blades offer greater control for detailed work. Keeping the blade clean and in good condition helps prevent uneven prints.
Screen-printing ink
Ink should be chosen for both the printing surface and the desired finish. Fabric inks are formulated for textiles, while other inks may be designed for paper, plastics or specialist materials. Check the manufacturer’s guidance for curing or drying requirements, wash fastness and compatibility. Before printing a full batch, test the ink on a sample of the chosen material.
Stencil materials and emulsion
A stencil determines where ink can pass through the mesh. For hand-cut designs, stencil film or paper may be suitable. For more detailed or repeatable work, light-sensitive photo emulsion can be applied to the screen and exposed with artwork printed onto a transparent sheet. The unexposed emulsion is then washed away to reveal the design.
Printing surface and registration tools
A flat, stable surface is essential. A printing platen or board supports garments and other items, while hinges or a screen-printing press help hold the screen in place. Registration guides, tape or simple alignment marks can help position multiple colours accurately.
Useful extras for a home studio
Several additional supplies can make printing cleaner and more efficient:
- Palette knives or ink spatulas for mixing and moving ink
- Masking tape to block off unwanted areas of the screen
- A scoop coater for applying photo emulsion evenly
- A suitable light source and transparent film for exposing designs
- A washout area, spray nozzle and screen-cleaning products
- Scrap material for test prints and colour checks
- Protective gloves and an apron to keep ink off skin and clothing
Choosing supplies for your project
Start with the material you intend to print on, the level of detail in your artwork and the number of prints you need. A simple one-colour design on paper may require only a basic screen, stencil, ink and squeegee. Multi-colour textile work calls for more careful registration, compatible inks and a reliable way to dry or cure each print.
Beginners may find a starter kit useful, but it is worth checking what it contains. Some kits include a screen and squeegee but not ink, emulsion or exposure equipment. Buying supplies individually can offer more choice, especially when selecting mesh count, frame size and ink type.
Care, cleaning and safety
Clean screens and tools promptly after use, following the instructions for the ink and emulsion. Dried ink can block mesh and affect future prints. Keep different cleaning products clearly labelled, work in a well-ventilated area where required, and follow the safety information supplied with each product. Store inks and chemicals securely, away from heat and out of reach of children.
Build a reliable printmaking setup
The right silk-screening supplies depend on the design, material and scale of the work. A well-matched screen, dependable squeegee and suitable ink provide a strong foundation, while careful preparation and cleaning help achieve repeatable results. Begin with a manageable project, test each material and process, and expand the setup as new techniques are introduced.
9 Essential Tips for Choosing and Caring for Silk Screen Printing Supplies
- Choose mesh count to suit your design detail.
- Use a sturdy frame that stays taut.
- Keep squeegee edges smooth and nick-free.
- Pick ink suited to your fabric or surface.
- Store photo emulsion in a cool, dark place.
- Use a compatible scoop coater for even coverage.
- Keep registration tools handy for multi-colour prints.
- Wear gloves when handling inks and chemicals.
- Clean screens promptly with suitable washout supplies.
Choose mesh count to suit your design detail.
Choose a mesh count that suits the level of detail in your design. A lower-count mesh lets more ink pass through, making it a good choice for bold artwork and thicker inks, while a higher-count mesh holds finer detail and is often better for intricate designs or thinner inks. Matching the mesh to your artwork and ink helps produce clean, consistent prints.
Use a sturdy frame that stays taut.
Choose a sturdy screen-printing frame that keeps the mesh taut, even with repeated use. A rigid frame helps maintain consistent tension across the screen, making it easier to control ink flow and produce clean, even prints. Check that the frame is firmly joined and free from warping before you begin.
Keep squeegee edges smooth and nick-free.
Keep squeegee edges smooth and nick-free to help ink pass evenly through the screen. Even a small nick can leave streaks, gaps or unwanted marks in a print. Check the blade before each session, and lightly smooth or replace it if you notice damage. After use, clean the squeegee thoroughly and store it flat or securely so the edge stays in good condition.
Pick ink suited to your fabric or surface.
Choose an ink formulated for the fabric or surface you plan to print on, as inks differ in how well they adhere, dry and withstand washing or handling. Textile inks are designed for garments, while paper, plastic and other materials may require specialist formulations. Always check the manufacturer’s instructions, including any curing requirements, and test the ink on a sample before starting your project.
Store photo emulsion in a cool, dark place.
Store photo emulsion in a cool, dark place to help preserve its quality and extend its shelf life. Heat and light can cause it to deteriorate or expose prematurely, making it less reliable when preparing screens. Keep the container tightly sealed and follow the manufacturer’s storage instructions for the best results.
Use a compatible scoop coater for even coverage.
Choose a scoop coater that is compatible with your screen’s size and mesh, so it can spread photo emulsion evenly across the surface. A smooth, consistent coating helps create a clear stencil and reduces streaks, pinholes and uneven exposure. Check the coater’s edge for damage before use, and clean it promptly afterwards to keep future coatings uniform.
Keep registration tools handy for multi-colour prints.
Keep registration tools close at hand when producing multi-colour screen prints. Registration guides, alignment marks or a printing press help position each screen accurately, so the colours line up cleanly and the finished design looks sharp. Taking time to secure and check the material between layers can prevent misprints and reduce wasted ink and supplies.
Wear gloves when handling inks and chemicals.
Wear gloves when handling screen-printing inks, emulsions and cleaning chemicals to help protect your skin from irritation, stains and potentially harmful substances. Choose gloves suited to the products you are using, and follow the manufacturer’s safety instructions. Replace them if they tear or become contaminated, and wash your hands thoroughly after removing them.
Clean screens promptly with suitable washout supplies.
Clean screens promptly after printing using washout supplies that are suitable for the ink and emulsion you have used. Removing residue before it dries helps prevent blocked mesh and makes screens easier to reclaim for future designs. Follow product instructions, work in a well-ventilated area where required, and rinse thoroughly.